Install Linux to PC and initial configuration
Why Linux
I have encountered some problems on the Windows platform while I was learing the full-stack developer course. Thus I would like to give it a try on a linux environment.
My original PC
Hardware:
- i5-6600K
- Asus z170a motherboard
- 2*8G memory
- nvme SSD 256 G
- HHD 2TB
I have a duel system on the PC. However, I have not been using the ubuntu since installation. The partition of the harddrives is not clean. With years of using, too many softwares have been installed on this PC. Thus, I have decided to make a clean installation.
Clean format of the harddrive.
I use a pre-made winPE usbdrive to boot the system and format both harddrives. The winPE is downloaed fromwepe. Use this tutorial to write the winPE into a usb drive. In general it is very simple. The winPE usb drive uses ‘exFAT’ format.
Download the latest ubuntu installatio file.
Download the latest .iso file and use Rufus to write the iso file into a bootable usb drive. Please see this video. I used the default setting.
Boot from winPE and format the two harddrivers.
The winPE system has a pre-installed software “Disk Genius”. Use it to clean all the data from the harddrivers. Make sure to have already backed up all data. Because this will remove everything!
Insert the ubuntu usb drive and install.
Again, check the video. I installed Ubuntu in the SSD drive. The installation goes very smooth. There is no need to
How to Mount a Disk
I have a hdd drive of 2TB. Which is not yet mounted to the system. I cannot use it after loggning into the system. I follwed the tutorial to mount the disk. There are in general the following steps:
- install a partition tool
sudo apt-get install gparted -
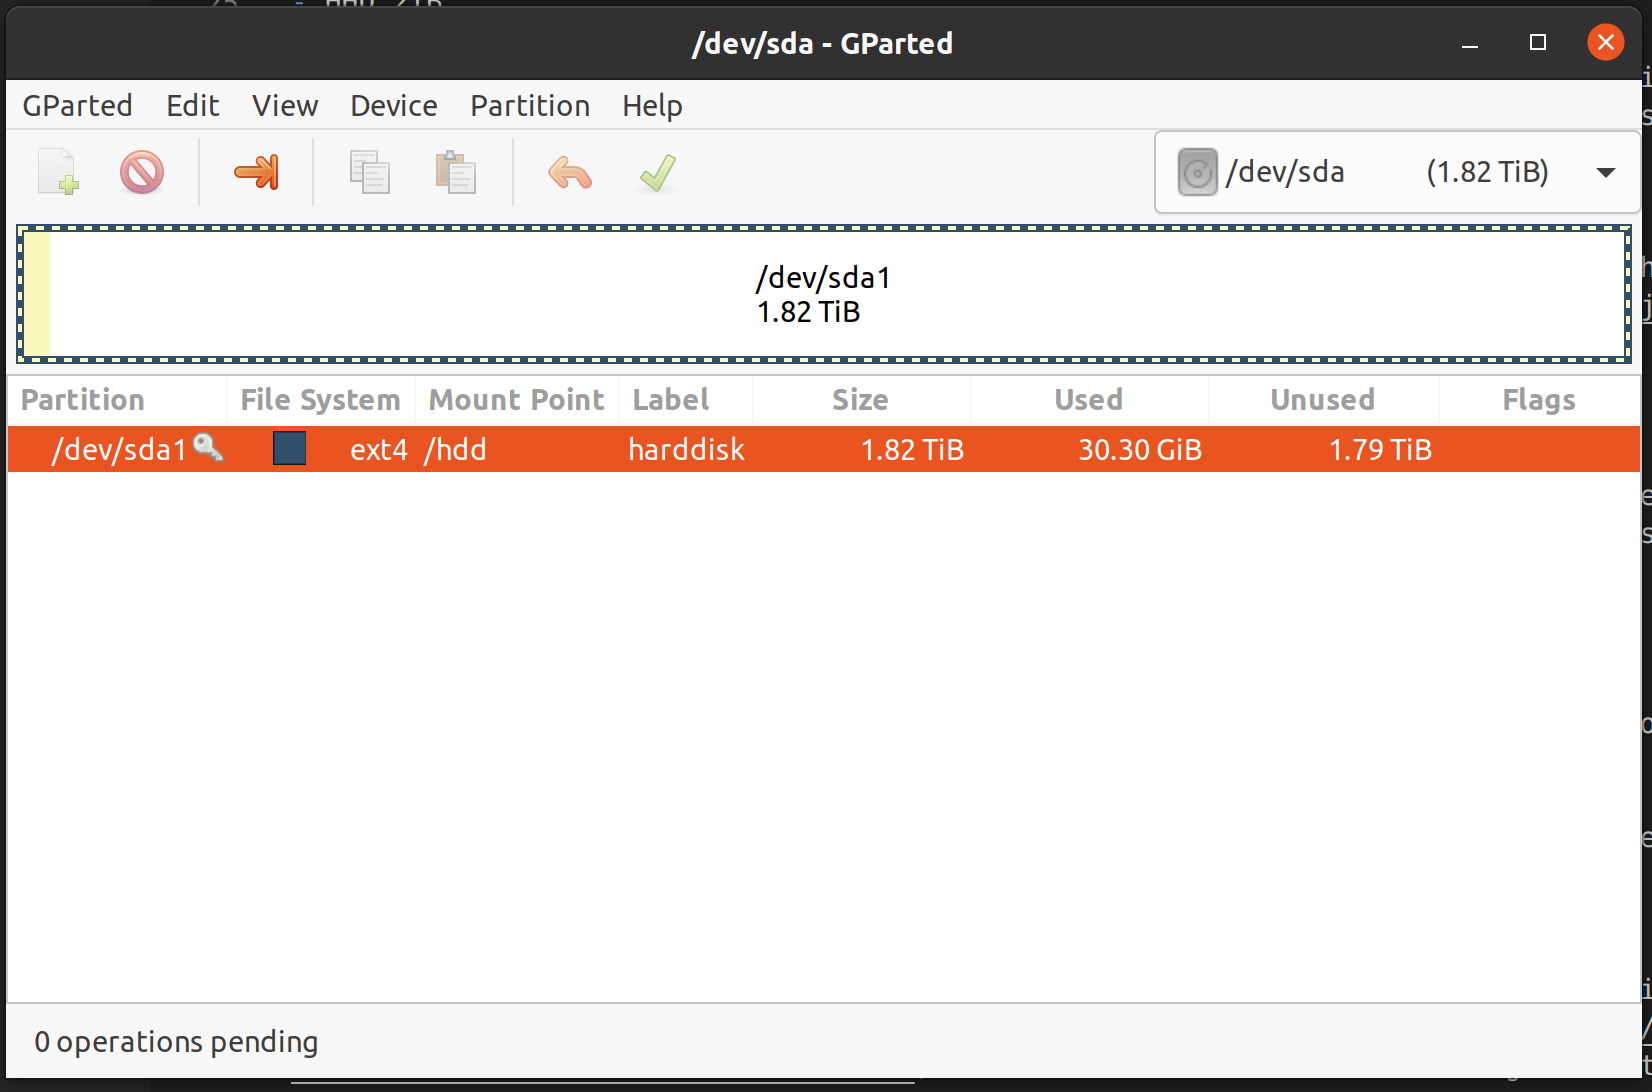
use the partition tool to make partitions. Here I refered to this tutorial. One thing need to NOTE. After apply the changes, I found that the partition is automatically mounted to
/media/yang, which I did not know why. But the gparted tool allow you to demount it. check the below example.

- run the following commands
# check the available partitions sudo fdisk -l # make a mount point. /hdd is the mount point. Please note that this point is not under the user folder. sudo mkdir /hdd - Edit /etc/fstab with
rootpermissionsudo vim /etc/fstab - Add the following line to the file
/dev/sda1 /hdd ext4 defaults 0 0 - Mount the partition
sudo mount /hdd
Problem After doing the above, I found myself that I have no permission to write in the mounting point. I guess it is because the current user has not been assigned the permission. Use the following commans to assign.
sudo chown -R yang:yang /hdd
After Installation
Install Chinese Input.
This is very simple. Just need to install ibus. Follow this tutorial. 现在可以用拼音了。Jag har ocksä svenska i datorn.
Install vscode.
NOTE Do not install vscode from ubuntus software center. It has problems with Chinese input. Download from official site and intall by sudo apt install ./<file>.deb
WPS office very slow opening after install ‘ibus’
Solution comes from this page.
sudo apt-get install libcanberra-gtk-module
sudo apt-get install appmenu-gtk2-module
This problem seems solved in the latest WPS version (Version 11.1.0.10702)
Install flameshot to take screenshots
$ sudo apt install flameshot
Install missing fonts.
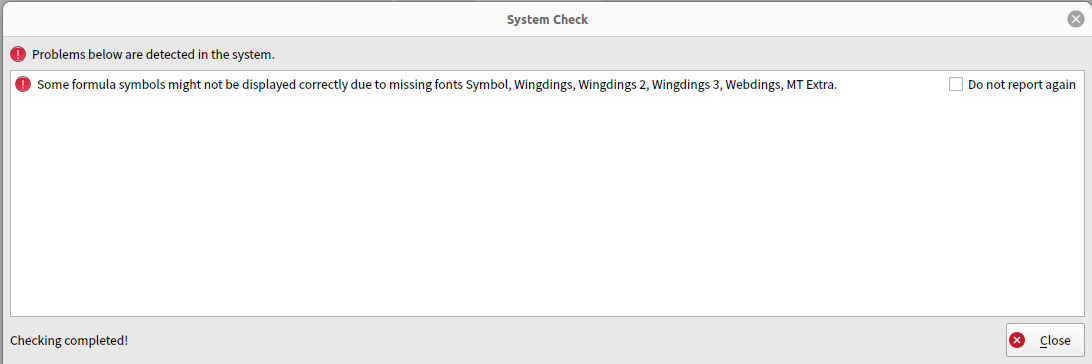
Some fonts are missing after the installation. For example, when using WPS, I get the following warning:

Some missing fonts can be downloaded from this website. Other missing fonts can be directly copied from a Windows Machine. In windows, the fonts can be found C:\Windows\Fonts. Copy the needed fonts to Ubuntu. And use the following commands to make the fonts available to all users of the machine.
True Type Fonts (TTF)
$ sudo cp *.ttf *.TTF /usr/share/fonts/truetype/
$ sudo cp *.ttc /usr/share/fonts/truetype/
Open Type Fonts (OTF)
$ sudo cp *.otf *.OTF /usr/share/fonts/opentype
USB-Wifi adapter
- Check the model of the wifi adapter
$ lsusb Bus 001 Device 004: ID 0bda:c811 Realtek Semiconductor Corp. 802.11ac NIC - Download and install the driver, check this discussion. The driver repo is here
$ cd ~/Downloads/ $ git clone https://github.com/brektrou/rtl8821CU.git $ cd rtl8821CU/ $ sudo ./dkms-install.sh - Reboot the PC. Now you can see the WIFI.
Gnome extensions
Install the chrome extension for gnome. Install through sudo apt install chrome-gnome-shell. After installation, go to the gnome page to install extensions for gnome. I used to install the following extensions.
- OpenWeather
- Simple System Monitor
- Application Menu
Enabling SSH on Ubuntu
This is quite straight-forward. Install the openssh server and start the service.
$ sudo apt install openssh-server
$ sudo systemctl status ssh
Install python on LTS ubuntu
Check this tutorial. The following tutorial is for the LTS version of Ubuntu. For Ubuntu verison other than the LTS, please refer to “Python Configuration in Ubuntu 21.04 or 21.10”.
A specific version of Python
Ubuntu comes with python installed. However, you can install another verison of python check this page. It is about how to install different version of python and switch between them. This page is also about how to install a different version.
sudo apt install software-properties-common
sudo add-apt-repository ppa:deadsnakes/ppa
sudo apt update
sudo apt install python3.7
Next, go to the virtualenv section to specify the python version.
install pip
sudo apt-get install python3-pip
pip3 --version
Install virtualenv
sudo pip3 install virtualenv
virtualenv --version
How to use virtualenv
- make a project folder using
mkdir pythontest. Navigate to the project folder bycd pythontest - run
virtualenv py_env.py_envis the virtual environment name. - run
source py_env/bin/activateto activate the virtual environment. - use
piporpip3to install required packages. - run
deactivateto deactivate from the virtual environment.
Build a virtualenv with specific python version
virtualenv --python=/usr/bin/python3.7 py_37
‘py_37’ is the virtual environment name. This should be done when the system has a python 3.7 installed. Reference is here.
How to delete the virtualenv
Just delete the py_env folder.
